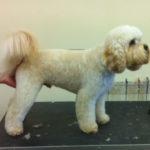
Is there anything worse than a client with a Lhasa Apso in full coat wanting a teddy bear trim? Maybe an Old English? Both can be tackled in half the time with comb attachments.
Comb Attachments – the great time savers!
First they enable you to trim down the coat to a manageable length, to encourage the coat to stand for you to put in shape and finish with your scissors. Secondly this allows for extremely consistent styling from salon to salon and from trim to trim. In my opinion, comb attachments are great time savers and in some cases almost eliminate the need to scissor finish.
They are commonly referred to as comb attachments and in some reference books you’ll also find them referred to as snap-on combs, blade guards or even cheater blades. Models are available from the major clipper brands – some as full sets and only a few as complete ranges that you can buy in individual sizes (a useful thing if one gets dropped or damaged).
Choosing the right clipper blade
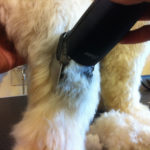
You’ll find that different manufacturers will recommend different blade sizes to work with their comb attachments – typically from a No10 blade right down to a No.40. I’ve found that the Mastercut stainless steel comb attachments work best over a No 30 or 15 blade whereas in the past I would have tended to use a No.40 blade with plastic combs.
Coat Prep is vital
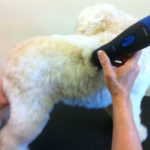
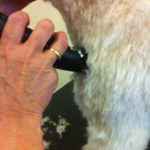
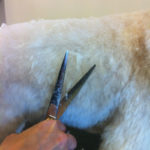
Before you begin, ensure the dog you are working on is completely clean and knot free. Be warned – comb attachments do not go through knots and if you hit one the result will be either a shorter patch, or worse, the comb attachment could come off.
Practise makes perfect
Like all grooming techniques, it takes practice. Here are a few simple tips you can follow if you are getting to grips with comb attachments for the first time:
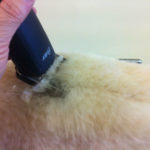
Clip in the direction of the coat growth.
You will need to clip over most coats 2-3 times before the coat is really smooth. The first time to remove bulk, the second to remove high spots and the third time to remove any areas missed and so help to minimise the time you spend on your ‘scissor finish’
Switching sizes – the general rule
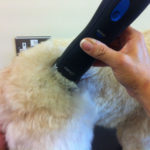
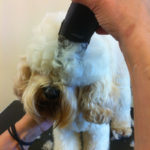
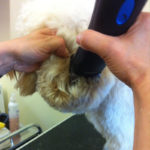
Usually as a rule we will use one length for the body and backside (almost like a schnauzer back leg) and then go one or two sizes up for the legs and the top of the head.
Longer coat styles
If you are already using the largest comb attachment for the body, then legs should be scissored to add style.
Long bodied dogs
You might decide to switch to a shorter comb for the throat and bum

* Is the coat knotted?
* Can you feel wetness/dampness still in the coat?
* Is there any dead undercoat that needs to be removed?
If the problem isn’t the coat, it’ll be to do with the clipper – so check:
* Is there a blockage of clippings – try to keep the gap between your comb and blade clear
* Did you clean and oil your blade before starting!
* If you’re blade’s clean and the whole set up is blockage free – then the problem could be related to your clipper’s performance.
If you think the blade speed has dropped recently it might well be time to get your machine serviced!
If you found this article useful why not try: Advanced Clipper Skills – Using The Comb Attachment In Reverse